Parts-in-Place is based on several key concepts, which are discussed in this chapter.
Contents
Documents
Documents in Parts-in-Place reflect actions in the assembly-related workflow. There are the following types of documents in the program:
- Assembly Orders
- Parts Orders
- Parts Arrivals
- Parts Transfers
- Assemblies
- Parts Write-Offs
- Inventories
- Bills of Materials.
Each document is a spreadsheet that can be created within Parts-in-Place and filled with data either manually or via importing from Excel. The system can also generate some of these documents automatically.
Bills of Materials
Parts-in-Place understands ECAD-generated BOMs in MS Excel format.
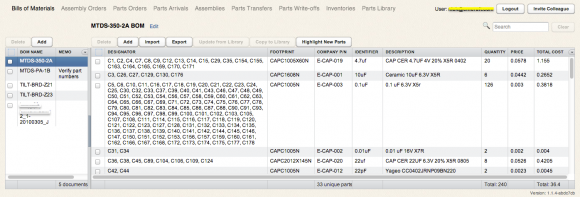
The primary purpose of BOM documents in the system is to identify the components required for your future builds. When planning a new build using Parts-in-Place, you will indicate which board you intend to build by selecting the appropriate BOM from the list.
The system will then calculate the quantities of parts that you’ll need to order, taking into account the components that you already have on inventory.
In addition to using BOMs directly for planning new builds, Parts-in-Place also offers a few convenience features for verifying, updating, and associating costs information with your Bills of Materials.
More about working with BOMs »
Assembly Orders
Assembly Orders is the central mechanism in Parts-in-Place for planning upcoming builds. Each Assembly Order document represents a pending build for which you want to reserve and/or order components.
Assembly Orders have the same structure as the Bills of Materials with the addition of several quantity-related fields:
- The planned build lot size
- Planned attrition for each part
- Total required quantity for each part. The system automatically calculates this value based on the build lot size you specify and the attrition and quantity-per-unit values for each component.
More about planning builds in Parts-in-Place »
Parts Orders
Parts Orders represent your purchase orders for electronic components.
Automatic generation of Parts Orders is one of the central capabilities of the Parts-in-Place system. The program automatically calculates the quantities of parts that you need to order for upcoming builds, taking into account whatever inventory you already have on hand. The result of that calculation is a new Parts Order document. What remains to you is to export it to an .xls file and place the order with a supplier.
Parts Arrivals
Parts Arrival documents need to be entered into the system when you receive new parts from your suppliers.
The purpose of these documents is to tell Parts-in-Place that you now have these parts in stock, so that the system will take them into account when calculating the quantities to order for future builds.
Parts Transfers
Parts Transfer documents are created to reflect transfers of the components you have, between different storage locations, such as storage in your office and at your Contract Manufacturer (CM).
The purpose of these documents is to keep Parts-in-Place updated on where your parts are, so that the system can then tell you what you need to do for a build: e.g. it can tell you which parts you need to ship to your CM – something that may be not immediately obvious if your inventory is spread across two locations.
More about transferring parts between storage locations »
Assemblies
Assembly documents are the way of telling Parts-in-Place that certain components have been used (consumed) for a build.
When the system processes an Assembly document, it subtracts the quantities of the parts used for this assembly from the available inventory. This way, Parts-in-Place becomes aware that the quantity of available parts has decreased and will take this into account when determining what needs to be ordered for a next build.
Parts Write-offs
Parts Write-offs is another category of documents that tell Parts-in-Place of a decrease in inventory quantities. In this way, it is similar to the Assembly document. The difference between the two is that Parts Write-offs are not necessarily related to the build process. For instance, you could create a Parts Write-off if you need to record a loss of some components. For example, let’s say you had had some parts in stock and then somehow they “disappeared.” In this situation, you would list these components with their quantities in a new Parts Write-off document, and this will tell Parts-in-Place that these components are no longer in stock and can not be used for future builds.
Inventories
The purpose of the Inventory documents is to tell Parts-in-Place the exact quantities of parts available at your storage location as of a certain date. Typically, you can create an Inventory document to reflect the results of a physical inventory that you (or your CM) have conducted.
An Inventory document doesn’t need to include information on all the parts you have on hand. Instead, it may include the data for just a single part number. Such a document would still be valid and useful for Parts-in-Place: it will tell the system the exact quantity of that particular part on a specific date.
You can have any number of Inventory documents in the system, and they may list any number of parts.
Document Status
Each document in Parts-in-Place has a Status that can be either Draft or Executed.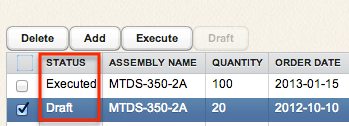 When a document has the status of Draft, it has no effect on the system and is not used for calculations. When you create a new document, it always starts out as Draft.
In order for a document to start having an effect, you need to Execute it. This is done by selecting the document and clicking on the Execute button. Once that operation is successfully completed, the document’s status is changed to Executed, and from that point on it will be used for calculations.
When you attempt to execute a document, Parts-in-Place first verifies the consistency of data within it (e.g. whether the key part numbers and quantities have all been filled in) and then it also verifies whether executing the document is possible given your current inventory levels (as known to Parts-in-Place).
For instance, if you attempt to execute a Parts Transfer reflecting a shipment of 1000 pcs of “Part A” from your office to your CM, yet according to Parts-in-Place you have only 800 pcs of “Part A” in stock in your office (a shortage of 200 pcs), the system will refuse to execute this document, displaying the appropriate warning message. To correct this situation, you will have to either modify the Parts Transfer document by reducing the quantity, or correct/add some other documents in the system in order to notify Parts-in-Place that you actually do have 1000 pcs of “Part A” in stock.
Storage Locations
All stock-related documents in Parts-in-Place include a field named Location. It can have two values: either Office or CM.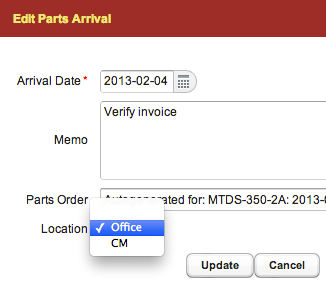 This field allows tracking inventory in two separate storage locations: storage in your office and storage at your Contract Manufacturer.
When receiving new parts from a supplier and entering a Parts Arrival document, you must specify the location (Office or CM) where your parts have arrived and are going to be stored.
When writing parts off for an assembly, you also specify the storage location from which the parts are to be taken. The default Location value for Assembly documents is CM.
You can use the Parts Transfer documents to reflect movements of parts between the two locations.
Tracking Physical Storage Location of Parts
In addition to tracking the quantities of parts at two separate general storage locations — “Office” and “Contract Manufacturer” — Parts-in-Place now also has the ability to track more specific physical locations of your parts in storage.
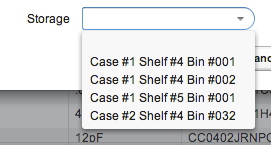
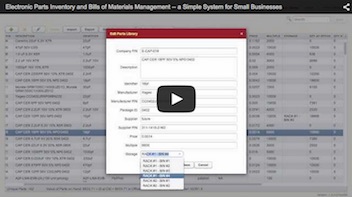
This is done via the Storage field on the Parts Library screen. The field is implemented as a drop-down list allowing you to enter new items as well as search “Google-style” by typing in the first few characters of a name and then choosing from one of the suggestions. You can create hierarchical storage identifiers such as “Case #1 Shelf #4 Bin #001,” and they will be sorted appropriately in the drop-down list.
Parts Library
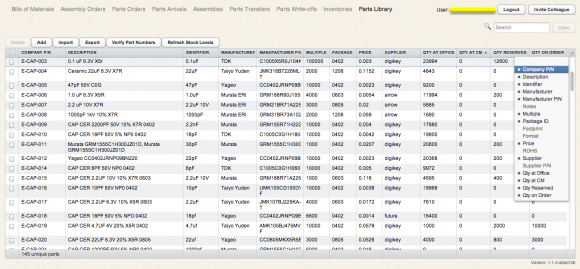
Parts Library is like an address book for your components. Here you can store information about the parts that you use in your projects, including data such as part numbers, manufacturer, preferred supplier, pricing, MOQ, and other details.
Parts-in-Place uses the Parts Library in several ways. First, for looking up data in it when processing documents. For instance, when calculating the required quantity to order for a part, the system will locate that part in the library and see if you have specified a Multiple Order Quantity (MOQ) for it. If you have, Parts-in-Place will include the MOQ for this part during calculations.
Also, Parts-in-Place provides an interface for comparing your BOMs against the library and identifying new parts (i.e. the parts in your BOM that are missing from the library).
The Parts Library screen in Parts-in-Place shows you the current quantities of parts in stock, on order, and those reserved for planned builds.
Company Part Numbers
Parts-in-Place uses your internal Company Part Numbers (Company P/Ns) as the primary parts identifiers within the system. This means that the Company P/N field values are used to match the parts in Parts-in-Place across various documents and the parts library.
If you do not currently use an internal part numbering system in your company, you might use the manufacturers’ part numbers in Parts-in-Place in lieu of company part numbers. This approach, however, has certain drawbacks and the generally accepted best practice in the industry is for design/manufacturing companies to have their own internal part numbers.
Whatever part numbering system you choose, use it consistently across all your documents and the parts library. Remember that the Company P/N field must always be filled in and must have the same value for the same part across all documents.
Data Import and Export
Parts-in-Place has been built from the beginning with the goal of making it “easy in – easy out” for users. Every document in the system can be imported from an MS Excel .xls or .xlsx file, and every document can be exported to an .xls file via a single click.


