Setting up Parts-in-Place for the first use boils down to importing your data. You’ll probably want to import your current inventory, as well as your parts library (some call it the Master BOM) and the Bills of Materials for individual boards that you intend to produce.
Importing Parts Library
To import the Parts Library, go the Parts Library screen and click Import.

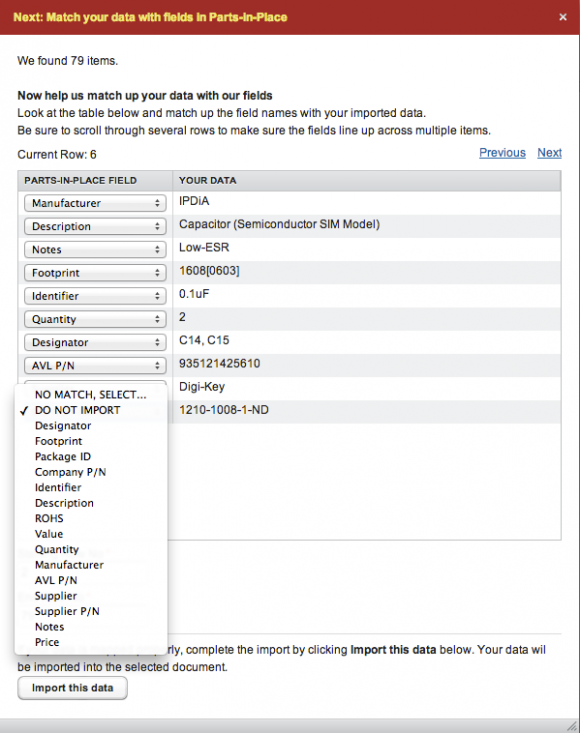
Once the file is uploaded, the system will ask you to match the columns in your data file with the Parts-in-Place system fields.
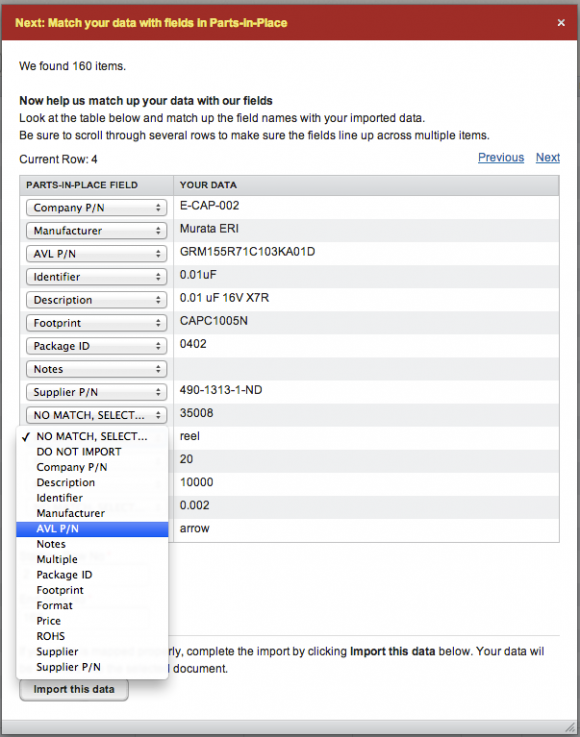
The field names are pretty much self-explanatory, so you shouldn’t have any problems. Just remember that the Company P/N field is required.
Once you’ve imported your library, it makes sense to verify part numbers.
Importing Current Inventory
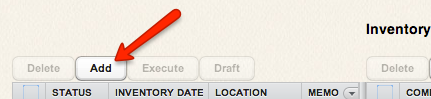
To import your current inventory, go to the Inventories screen. Once there, click Add above the left-side table.
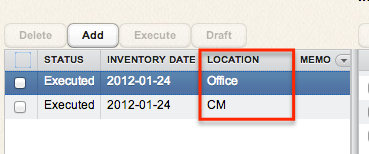
This will create a new empty Inventory document – a new row will be added to the documents table. Double-click on that row. This will open an edit window allowing you to fill in the document’s details: the effective date of the Inventory, the location at which the parts that will be listed on this document are stored, and a memo.
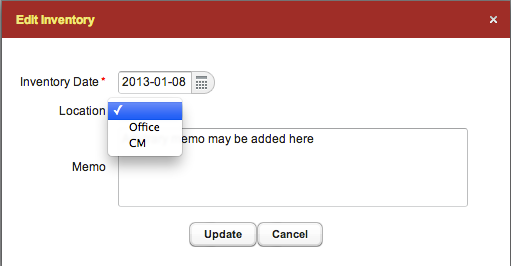
As discussed in a previous chapter, the Location can be either Office or CM. If you have parts stored at both locations, you should create and import a separate inventory document for each location.
Once a document has been created, to import its contents from Excel, just select the document in the table and then click Import. This will open a file upload dialog and then a window where you will need to match the columns in your inventory file with the Parts-in-Place system fields.
The important fields to match for an Inventory are the Company P/N and Quantity. There are a few other fields that you can import also, such as Price and Description, but these are not critical, and you can have Parts-in-Place fill them in for you automatically later on, from the Parts Library.
Importing Bills of Materials
To import a BOM, go to the Bills of Materials screen and click Add.
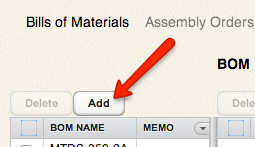
This will create a new Bill of Materials – you will see it as a new row added to the documents table, on the left-hand side of the screen. Select the new row and click Import. This will open a file upload dialog and then a window where you will be asked to match the columns in your BOM file with the Parts-in-Place fields.
All the field names are pretty much self-explanatory, so you shouldn’t have problems. Just remember about the Company Part Numbers.
When importing a Bill of Materials, the system will automatically set the BOM Name to the name of the file you’ve uploaded. You can edit the name, and also optionally add a memo, by double-clicking on the BOM document on the left-side table.