In order for Parts-in-Place to calculate the quantities of parts that you need to order for upcoming builds, the system has to know the quantities of parts you already have in your inventory.
You can convey this information to the system by entering documents reflecting the flow of your parts. I.e. when you purchase and receive new components, you enter a document telling the system that you’ve received these parts. When you use parts from your inventory, you enter a document telling the system that those parts have been used.
These operations are described in detail in the sections that follow.
Contents
Inspecting Current Stock Levels
You can view your current inventory levels on the Parts Library screen. The columns Qty at Office and Qty at CM show the quantities that you have of each part at the two storage locations.
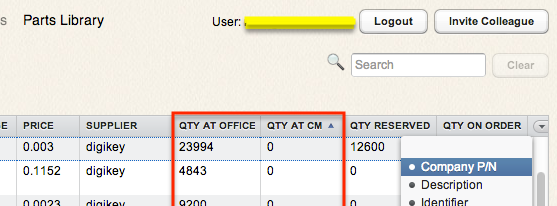
To refresh/recalculate the quantity values displayed, click the Refresh Stock Levels button.
You’ve probably noticed two other quantity-related columns alongside the Qty at Office and Qty at CM – Qty Reserved and Qty on Order.
The Qty on Order field shows the quantities of parts that you have ordered (as per the Parts Orders documents) but not yet received (as per the Parts Arrivals documents).
The Qty Reserved field shows the quantities of parts that the system has reserved for your upcoming builds (as per the Assembly Orders documents) but which have not yet been actually consumed for assemblies (as per the Assemblies documents).
Receiving Parts from Suppliers
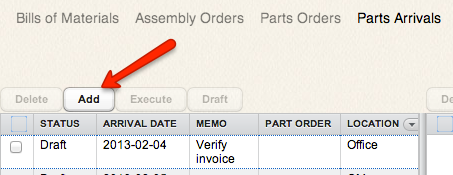
When you receive new parts from your suppliers, you need to enter this information into Parts-in-Place in order for the system to track the inventory for you. The information on newly received parts is entered via Parts Arrivals documents.
To create a new Parts Arrival, go to the Parts Arrivals screen and click Add.
There are multiple ways to populate a Parts Arrival document with data. As with any other document in Parts-in-Place, you can enter the data manually or you can import it from Excel. For Parts Arrivals, there is also a third option, and that is to copy the data from a Parts Order.
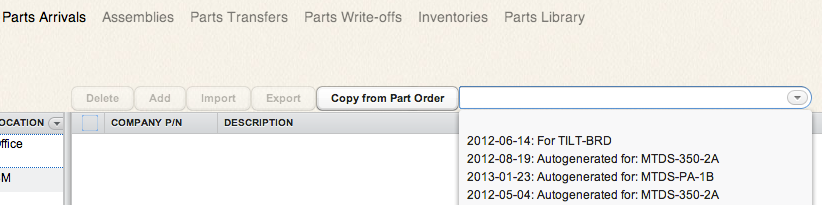
Copying from a Parts Order is convenient when there is a matching Parts Order in the system for the batch of parts that you are receiving. (As a side note, Parts-in-Place doesn’t require you to have a Parts Order for every Parts Arrival. You may enter Parts Arrivals without any corresponding Parts Orders.)
Regardless of which method you use to fill in the Parts Arrival document, here is one important point to remember:
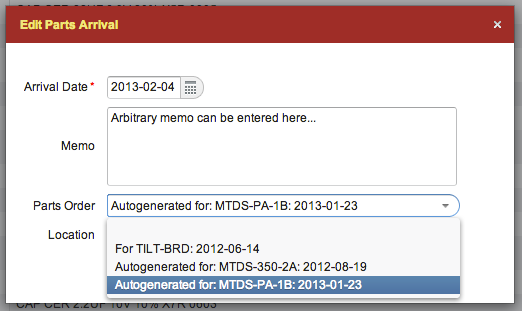
If a Parts Order has previously been created (and executed) for the parts that are now arriving, be sure to link the Parts Arrival document with the corresponding Parts Order document. To do this, edit the Parts Arrival document and select the corresponding Parts Order from the dropdown list.
If you fail to link a Parts Arrival with its corresponding Parts Order, this will skew the system’s inventory calculations. Parts-in-Place will count the arrived parts twice: it will add them to the available inventory (Qty in Stock) while still keeping them accounted for in Quantity on Order. Basically, the system will continue to think that you are still due to receive these parts soon, while in reality you have already received them.
As you can imagine, such inconsistency would lead to incorrect calculations when planning future orders.
After you receive parts from a supplier, you’ll probably need to ship them to your contract manufacturer. As with any other parts movements, you should reflect this shipment in Parts-in-Place so that the system will know where your parts are. How to reflect the transfers of parts between storage locations is discussed in the next section.
Transferring Parts between Storage Locations
Parts-in-Place can track inventory separately at two storage locations: in your office and at your contract manufacturer (CM). When you move parts between the two locations, you should tell Parts-in-Place about this by creating a new Parts Transfer document. The document has To and From fields, as well as Date and Memo.
Parts Transfers can be created manually or generated automatically by Parts-in-Place. Automatic generation of this document lets you determine exactly which components you need to ship to your CM in order to perform a build. Here is how this works.
Generating Parts Transfers Automatically
Go to the Assembly Orders screen and select (via the checkboxes) one or more Assembly Orders for which you want to generate a Parts Transfer. Then click Generate Parts Transfer.

The system will check the current inventory levels at your CM and verify whether they are sufficient to complete the pending builds represented by your selected Assembly Orders. Any shortage of parts currently at the CM will be included in the generated Parts Transfer document.
In other words, the resultant Parts Transfer will list all the parts with the required quantities that you need to ship to your CM in order to complete the builds you have selected.
Creating Parts Transfers Manually
Manually, Parts Transfers are created in the same way as any other documents in Parts-in-Place:
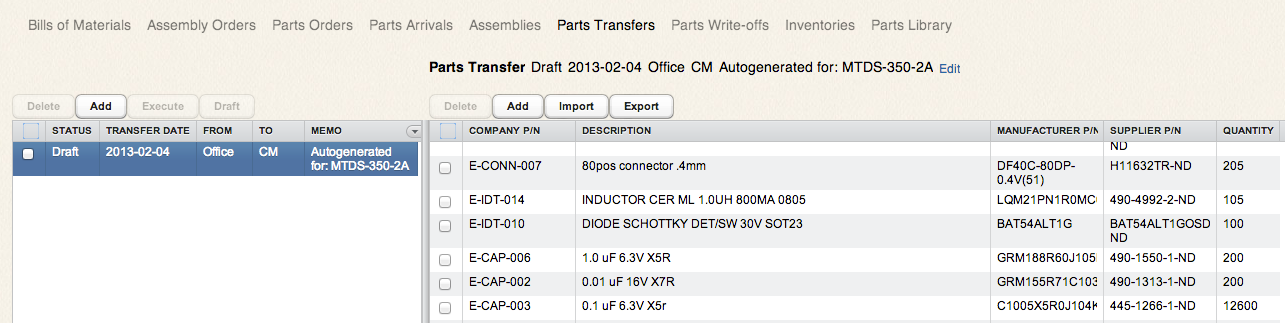
Go the Parts Transfers screen and click Add. As always, you can either import the data from a file or enter it manually.

To edit the To, From, Date, or Memo settings, double-click on the document.
Accounting for Losses
Sometimes, you may have situations when parts “disappear” from your inventory without having been used for a new assembly. This can be a lost shipment or some damage occurring to the parts in storage, or, possibly, some parts were used for repair work. The end result is that some components previously in your stock are no longer there, and so you need to update your data in Parts-in-Place in order to have an accurate account in the system.
There are two ways to account for a decrease in available parts without an assembly: 1) via a Parts Write-off document or 2) via an Inventory document. The difference between the two approaches is this:
With Parts Write-offs, you specify the quantities of the components that you are writing off, while with Inventories you specify the quantities of the components that have remained in stock.
In both cases, you list only the affected components on the document, i.e. those whose quantities you are adjusting, but the numbers that you specify have a different meaning:
For the Parts Write-offs, the numbers are the amounts by which the remaining quantities have decreased, whereas for the Inventories it is the new actual remaining quantities after the decrease.
Recording Results of Physical Inventories
Whenever you conduct a physical inventory of parts in your possession, it is a good idea to record the results in Parts-in-Place. This is done via Inventory documents. An Inventory document establishes a reference point for calculations of the quantities of parts moving forward.
An Inventory document doesn’t have to include information about all the parts in your possession. Instead, it may well include the data for just a single part number.
You may have one Inventory document listing quantities for, say, ten parts, and then you may have other Inventory documents listing quantities for other parts. You might have one and the same part listed on multiple Inventories.
All the Inventory documents are independent of one another: Parts-in-Place will always look for the most recent Inventory listing the specific part.
For a more in-depth explanation on how the Inventory documents are used, refer to the article How Parts-in-Place Calculates Stock Levels.